 Phone Stands
  Sun Protection
  Car Cleaning
  Car Chargers
  Powerbank
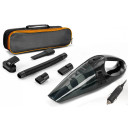


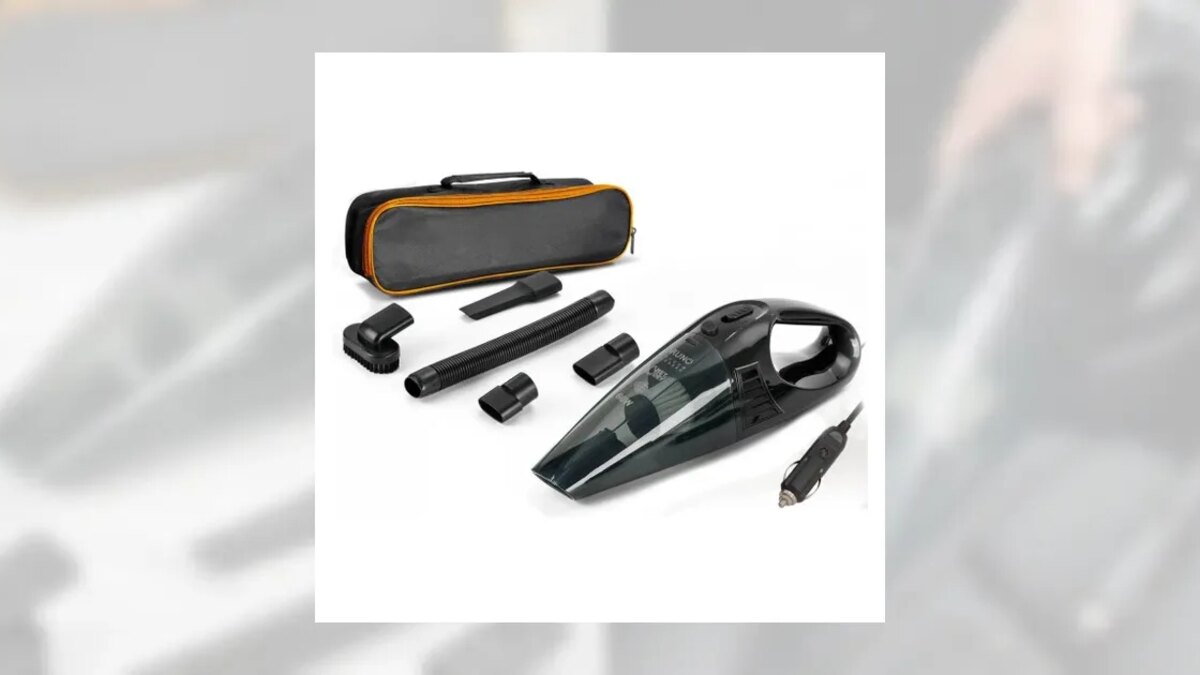
A cleaner car interior does not begin with frantic scrubbing; it begins with the right order. When loose items come out first and dry debris is removed from high surfaces before the floor, every later step becomes faster and you avoid cleaning the same place twice. This guide turns interior car cleaning into a practical sequence that works for a quick reset or a more deliberate weekend session. For portable pickup between and under seats, the BRUNO BRN-0294 wet/dry car vacuum is a naturally useful option: it costs €28.80, runs at 60W from a 12V car socket, and has a 280cm cable, a 400ml removable bin, a removable washable HEPA filter and low-noise operation. Its brush, crevice nozzle, two connectors, extension hose and carrying/storage bag help organize the job without making unsupported claims about suction power.
Prepare the cabin and your tools
Park in a safe, well-ventilated place with enough room to open every door. Switch the engine off while organizing the cabin, engage the parking brake and remove the keys if that is appropriate for your vehicle. Read the car manual before cleaning around airbags, seat controls, displays, sensors, speakers or special upholstery. Also read every cleaner label. A product that is suitable for household fabric may be unsuitable for automotive leather, a coated dashboard or a touch display.
Declutter methodically. Take out rubbish, bottles, receipts, toys, chargers and loose objects from the doors, cupholders, console and seat pockets. Sort what will return to the car and what belongs elsewhere. Remove the mats, but first photograph or note how clips and retention points fit so the driver’s mat can be secured correctly afterward. Never stack a loose mat over a fitted one near the pedals.
Gather microfiber cloths, a soft detailing brush, a suitable glass cloth, small bags for rubbish and only material-compatible cleaners. Test any cleaner on a small hidden area, allow it to dwell and dry as directed, then check for discoloration, texture change or residue. Do not mix chemicals. Keep ventilation open, follow label instructions and wear any protection the manufacturer requires.
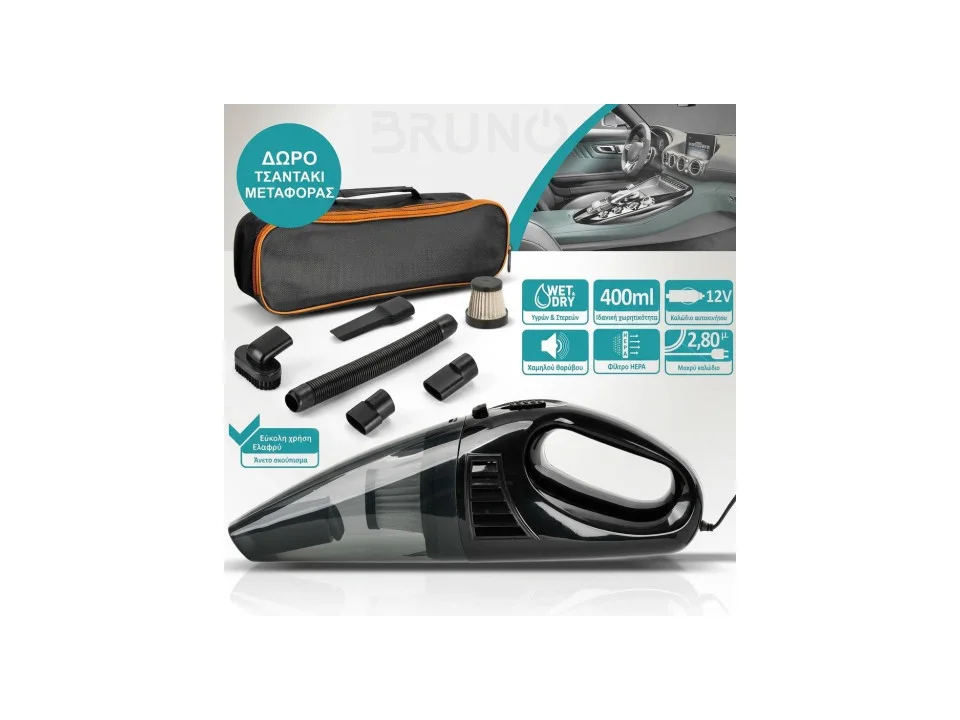
Before connecting a 12V appliance, consult the vehicle and product instructions. Confirm the socket’s location, rating and recommended ignition state, because vehicle electrical systems differ. Route the BRN-0294’s 280cm cable away from pedals, seat rails, door latches and sharp edges. Inspect the cable, plug, body, bin, filter and attachments before use; do not operate damaged equipment.
Remove dry debris from top to bottom
Dry cleaning should come before damp wiping. Start high and work downward so loosened dust lands on areas that have not yet received their final pass. Use a clean, soft brush or dry microfiber cloth around upper trim, vents and dashboard seams, directing debris toward an open area where it can be collected. Be gentle around screens, glossy trim and instrument clusters because trapped grit can scratch them. Never push tools into vents or gaps containing wiring or sensors.
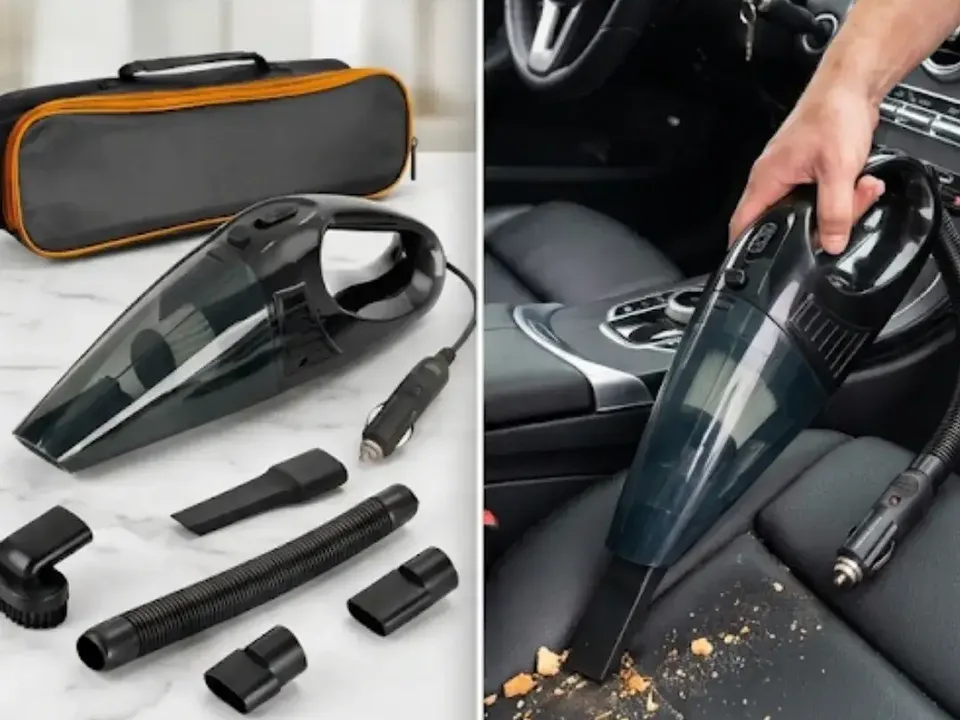
Move to seat surfaces, the spaces beside the center console and then the carpet. On the BRUNO BRN-0294, the brush is useful where its bristles are safe for the material, while the crevice nozzle and extension hose can help reach narrow or awkward zones. Let the attachment approach dirt rather than dragging the hard edge forcefully across plastic, leather or delicate fabric. Keep jewelry, loose clothing and long hair away from the inlet.
Work in small sections with overlapping passes. Pick up coins, clips, stones and other larger or sharp items by hand instead of asking the vacuum to ingest them. Pay attention to the front edge of each seat, the seatbelt buckle area and the carpet under the pedals, but never interfere with seat wiring, connectors or safety components. If a seat can move, check its path first and move it only while the cable and accessories are clear of the rails.
The goal is not to chase invisible perfection. It is to remove the debris that grinds into fibers, collects moisture or makes controls unpleasant to use. Emptying clutter and dry material first also reveals stains that need a separate, material-specific treatment instead of repeated vacuuming.
Reach crevices without causing damage
Crevices are where a compact car vacuum earns its place, but narrow access requires patience. Begin with the gaps between seat cushions, around seat runners, along door pockets and beside the console. Use the crevice nozzle or extension hose without forcing it under trim. If an object is wedged firmly, stop and remove it by hand or seek professional help; levering against plastic can break clips, and probing blindly can contact wiring.
Loosen crumbs with a soft brush while holding the vacuum inlet nearby. This controlled brush-and-collect method keeps particles from simply moving into another seam. For cupholders, remove inserts only if the vehicle manual allows it, then collect dry debris before using a lightly damp cloth. Avoid pouring cleaner directly into switches, sockets, USB ports or seams.
Give special care to the area around a phone mount. Adhesive pads, vent clips and joints can trap dust, yet aggressive cleaner may weaken adhesives or mark trim. Remove or reposition a mount according to its instructions rather than pulling it suddenly. If your setup needs improvement after cleaning, see the premium car phone mount guide for placement and use considerations. Reinstall any mount only on a fully dry, compatible surface, and never where it blocks airbags or the driver’s view.
Clean mats and seats by material
With the mats outside the vehicle, shake loose dirt in an appropriate place away from people and nearby cars. Vacuum both sides, including edges and retention holes. Rubber or all-weather mats may tolerate a different method from textile mats, so follow their care instructions. If washed, they must dry completely before returning to the footwell. A damp mat can encourage odor and moisture, while an unsecured driver’s mat can obstruct pedal movement.
For fabric seats, collect dry grit before treating marks. Blot rather than rub a fresh stain, and apply a fabric-safe cleaner sparingly according to its instructions after a hidden-area test. Too much liquid can move a stain deeper into padding and prolong drying. The BRN-0294 is a wet/dry vacuum for suitable pickup, but it is not a carpet extractor: it does not replace the controlled application and recovery process of an extraction machine, and it should not be used as an excuse to flood seats or carpet.
Leather, synthetic leather, suede-like materials and specialty textiles need their own approved products and techniques. Vacuum with a non-scratching attachment and low physical pressure, keeping hard nozzle edges away from bolsters and stitching. Never assume a general-purpose cleaner is leather-safe. Perforated or ventilated seats deserve extra restraint because liquid can enter the holes and reach internal components.
Check under child seats only after reviewing both the restraint and vehicle instructions. If you remove a child seat, it must be reinstalled and tightened exactly as its manufacturer specifies; when uncertain, use a qualified fitting service. Do not apply cleaners or accessories that could alter belt webbing, buckles or restraint performance.
Handle small wet spills carefully
Act early on a small, suitable wet spill: stop the source, protect electronics and blot excess liquid with an absorbent cloth. Identify the liquid before deciding what to do. Plain water is different from an oily fluid, solvent, fuel, unknown chemical, bodily fluid or contaminated material. Do not vacuum flammable liquids, fuel, solvents or unknown substances. Ventilate safely and seek specialist guidance when a spill presents a chemical, biological or electrical risk.
For an ordinary, limited spill on a compatible area, follow the BRN-0294 instructions for wet pickup, including the correct assembly and any limits described by the manufacturer. Keep the unit oriented and operated as instructed, monitor the 400ml removable bin and stop before overfilling. Do not assume “wet/dry” means the appliance can collect any liquid or that the cabin can be saturated. Keep moisture away from seat connectors, controls, airbags, speakers and power outlets.
The headliner requires particular caution. Its fabric and adhesive layers can sag, separate or stain when soaked or aggressively brushed. Use the least moisture possible and do not press a vacuum attachment hard against it. Electronics need even stricter treatment: never spray a screen, switch panel or control module directly. Apply a compatible product to a cloth only when the vehicle and cleaner instructions permit it.
After pickup, open doors or windows in a secure location and allow the cleaned area to dry fully. Persistent dampness, musty odor, a large spill or water entering beneath the carpet can indicate moisture beyond the reach of a handheld cleanup. Professional assessment is more appropriate than masking the smell or repeatedly wetting the surface.
Wipe surfaces and clean the glass
Once loose dirt is gone, wipe hard surfaces with clean microfiber cloths and products approved for each material. Work from the cleaner upper dashboard toward the console and lower door areas, changing or folding the cloth so grit is not dragged across trim. Apply minimal moisture. A shiny dressing on steering wheels, pedals, gear controls or floor surfaces can reduce grip, so leave control surfaces clean, dry and free of slippery residue.
Use a display-safe method for infotainment and instrument screens. Some coatings are damaged by ammonia, alcohol or abrasive cloths, while vehicle instructions may specify a particular product. Never scrape a screen or flood its edges. Around buttons and seams, lightly wipe rather than spraying into openings.
Clean interior glass last because earlier brushing and wiping can redeposit dust. Use a glass product compatible with automotive tint and any special coatings. Spray onto the cloth, not toward the dashboard, and use modest amounts. A separate dry cloth can remove streaks. Lower side windows slightly, where safe, to clean the top edge, then close them and check the glass from multiple angles.
Visibility is the safety priority. If residue remains on the windscreen, repeat the process with a clean cloth rather than adding heavy product. Keep liquids away from camera and sensor housings, rear-window electrical elements and trim adhesives. If the vehicle manual restricts cleaning around an advanced driver-assistance sensor, follow that instruction.
Finish, inspect and reset the cabin
Finishing is more than adding fragrance. Inspect the cabin in daylight if possible. Check seat seams, floor edges and cupholders for missed debris, then make sure every cleaned area is dry. Return only useful items, securing them so they cannot roll under pedals or become projectiles during sudden braking. Put rubbish bags and dirty cloths outside the vehicle.
Reinstall completely dry mats on their correct sides and engage every retention point. Press each mat flat, confirm it does not overlap another mat and manually check that it stays clear of all pedals. Restore seat positions carefully, ensuring the vacuum cable and attachments are no longer near rails. Refit removable inserts and accessories according to their instructions.
Do a final safety sweep: no cleaner film on controls, no cloth on a seat, no bottle in the driver’s footwell and no cable crossing an entry point. If you use a phone mount, confirm that it remains stable and does not obstruct visibility or airbags. Pack the BRN-0294, attachments and dry accessories in the included carrying/storage bag so the next cleanup starts with a complete kit.
A short maintenance pass every week or after a messy trip reduces the need for aggressive deep cleaning. Remove rubbish, collect fresh grit and blot new spills before they set. Explore more tools in car cleaning, and use the BANDO blog for practical accessory guides that can support an organized cabin.
Care for the bin and washable HEPA filter
Maintenance protects cleanliness and consistent operation. Disconnect the BRN-0294 from the 12V socket before opening, emptying or cleaning it. Remove the 400ml bin according to the product instructions and dispose of dry contents without creating a dust cloud. Wet contents should be discarded in a manner suitable for the collected material; do not pour unknown or harmful substances into a drain.
Inspect the bin seals, inlet and attachments for trapped debris. Clean only as the instructions permit and never immerse the motor body, cable or 12V plug. The removable HEPA filter is washable, but “washable” does not mean it can be reinstalled damp. Remove it carefully, clean it using the documented method and leave it in a ventilated place until it is completely dry throughout. Drying time changes with humidity and airflow, so judge the filter itself rather than relying on a rushed timetable.
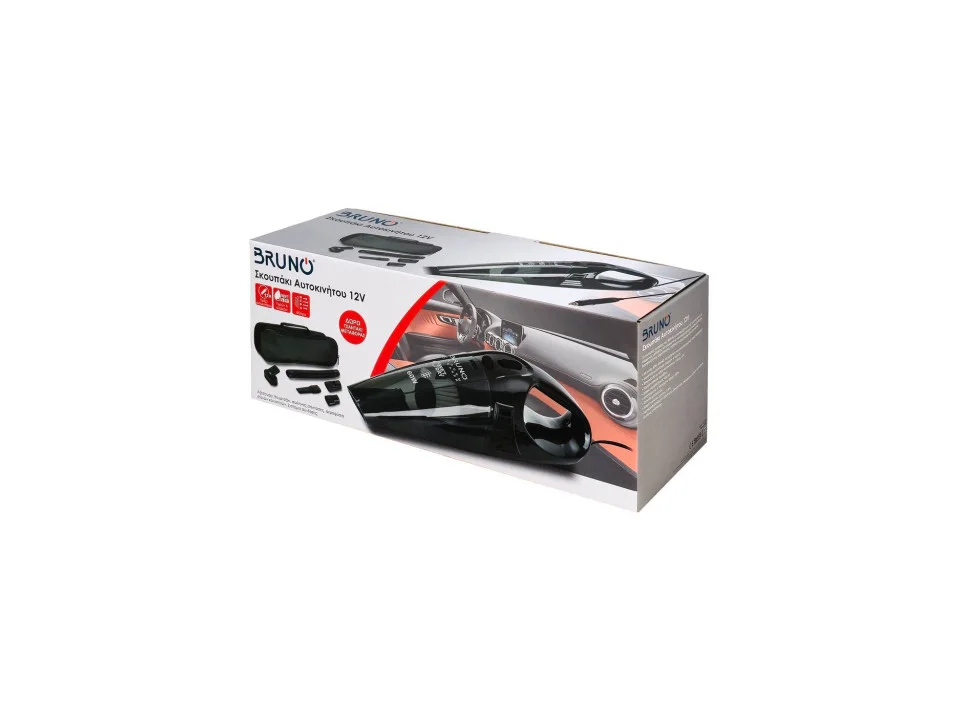
Never use direct high heat, an oven, a microwave or an open flame to accelerate drying. Do not operate the vacuum without the correctly installed filter, and replace a damaged, misshapen or persistently clogged filter with the appropriate part. Reassemble only when the bin and filter are clean, dry and correctly seated. Coil the cable loosely without sharp bends, check that accessories are dry and store the set in its bag in a clean, dry location.
Avoid unsafe cleaning mistakes
- Starting with wet products: dry grit can become muddy and harder to remove. Collect loose debris first.
- Using one cleaner everywhere: test products in a hidden area and match them to the exact material.
- Saturating seats, electronics or the headliner: excess liquid can reach padding, adhesives, wiring and controls.
- Treating a wet/dry vacuum as an extractor: the BRN-0294 can collect suitable wet material as instructed, but it is not a carpet extraction machine.
- Vacuuming hazardous material: never collect hot ash, glowing debris, sharp objects, flammable liquids, fuel, solvents or unknown substances.
- Forcing tools into gaps: wiring, sensors and fragile clips may sit behind trim.
- Overfilling the 400ml bin: monitor it and empty it following the instructions.
- Reinstalling a damp HEPA filter: wash it correctly and allow complete drying before reuse.
- Leaving mats loose: secure the correct mat at every retention point and verify pedal clearance.
If a job involves mold, sewage, broken glass spread through upholstery, fuel, major flooding or dismantling seats with electrical and restraint systems, pause the DIY routine. A trained professional has the equipment and procedures to manage risks that a compact car vacuum and ordinary cloths are not designed to solve.
Frequently asked questions
What is the best order for cleaning a car interior?
Declutter first, remove dry debris from top to bottom, clean crevices, then address mats and seats. Handle only suitable small wet spills carefully, wipe material-compatible surfaces, clean glass and finish with a dry, safety-focused inspection. This order limits rework and keeps loose grit out of the damp-cleaning stages.
Can the BRUNO BRN-0294 clean wet car carpets?
It is a wet/dry car vacuum for suitable pickup when assembled and used according to its instructions, but it is not a carpet extractor. Do not flood carpet or upholstery. For a small ordinary spill, blot first, protect electronics, monitor the 400ml bin and dry the area completely; seek professional help for extensive moisture.
Can I vacuum hot ash, glass or fuel with a car vacuum?
No. Never vacuum hot ash, glowing material, sharp objects, flammable liquids, fuel, solvents or unknown substances. Pick up safe larger objects by hand with suitable protection, and use specialist cleanup for hazardous, sharp or contaminated material.
How should I care for the BRN-0294 HEPA filter?
Disconnect the vacuum, remove the filter as instructed and clean the washable HEPA filter using the documented method. Let it air-dry completely throughout before reinstalling it. Never operate without the correctly fitted filter, reinstall it damp or use direct high heat to speed drying.
Build an easier cleaning routine
A repeatable sequence and a tool that stays in the car can make interior cleaning less of a rescue operation. The BRUNO BRN-0294 wet/dry car vacuum at €28.80 combines confirmed essentials for cabin upkeep: 60W operation from the 12V car socket, a 280cm cable, 400ml removable bin, removable washable HEPA filter, low noise, brush, crevice nozzle, two connectors, extension hose and a carrying/storage bag. Use it within its instructions, respect each cabin material and finish every session by cleaning and fully drying the parts that need care.